As an engineer that designs and builds on EC2, I am pro Infrastructure as Code:
- I like programming rather than tedious, error-prone clicking though a UI.
- I want to minimize my work if I have to change cloud providers (e.g., move from AWS to Azure, or on-prem to AWS)
- I want to generate a graph of dependencies among infrastructure components
Most of all, I want my team members who are not keen on, as some of them say, “DevOpsy” work, to see that DevOps, infrastructure engineering, and IT Operations are not the same thing! Those three topics are all big ideas, but this exercise will just tackle one of them: Infrastructure as Code. We can make infrastructure something real and more familiar. Once we have repeatable, usable infrastructure, we at least have a part of the automation required for implementing DevOps in an organization.
I decided to put together an exercise using Terraform to provision a TeamCity installation on AWS. This tutorial provides a very basic installation. If you need a more sophisticated setup, this is a good starting point for you, and you can add your specific infrastructure requirements. High-availability, zero-downtime deployments, DR, monitoring, etc. are out of scope for now.
You can find this code on github
Tools:
- AWS to host TeamCity. You need familiarity with AWS. We won’t be focusing on the AWS UI and how to set things up via point and click, though I’ll show you how to navigate AWS to visually see your changes.
- TeamCity for continuous integration. You also need to be familiar with TeamCity. We will not be going through TeamCity training. We will just confirm that it works properly.
- Terraform for infrastructure coding. We won’t go deep into learning Terraform. You can refer to the HashiCorp documents if you want to learn more.
- Docker to install TeamCity. Basic familiarity with Docker is helpful but not required.
Getting started:
- We will be using
makelater in the tutorial. If you’re on OS X like me, you may need to installbrew install make --with-default-names.- If you don’t want to use
make, copy the commands from the makefile and run them manually in your terminal
- If you don’t want to use
- TeamCity 2017.2+ has a free account with 3 build agents for 100 build configurations. You can start there and purchase the license if you need more. There’s no need to download anything right now…we’ll be using a Docker image of TeamCity.
- Install terraform
- brew install terraform
- Setup your AWS account
- create a non-admin user with proper accesses to perform the following. Avoid using your admin user to make changes in AWS. Here are my Permissions…adjust based on your needs:
- AmazonRDSFullAccess
- AmazonEC2FullAccess
- AmazonS3FullAccess
- AmazonDynamoDBFullAccess
- AmazonVPCFullAccess
- create a non-admin user with proper accesses to perform the following. Avoid using your admin user to make changes in AWS. Here are my Permissions…adjust based on your needs:
NOTE:
- I am using resources available in us-east-2. If you prefer to use a different region or change instances you will need to change the following accordingly:
- region in variables.tf
- debian_ami in variables.tf
- instance_type in ec2/main.tf
- instance_class in rds/main.tf
- This is a great source for aws instance price information and region availability: ec2instances.info
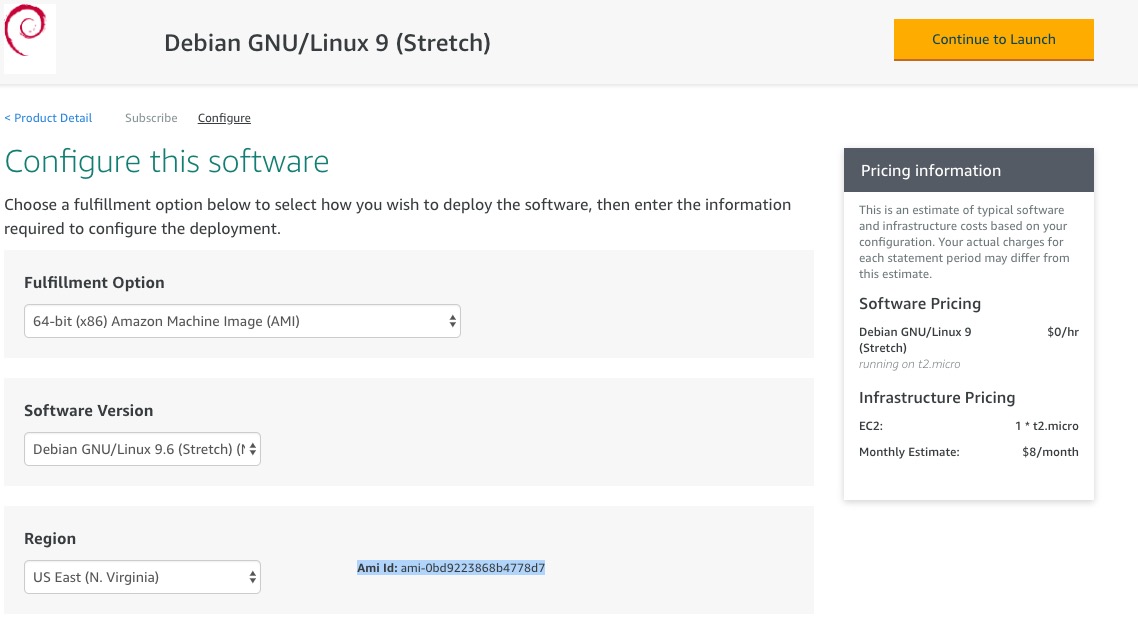
- To choose a different ami:
- Visit the AWS marketplace and filter the results (i.e. All Infrastructure, Amazon Machine Image, Free, API, in the next window select your region …)
- Pick your image and “Continue to Subscribe” > “Continue to configuration”
- Make a note of the Ami Id: In my case, it’s
ami-0bd9223868b4778d7 - DO NOT CONTINUE TO LAUNCH…we’re going to do this in terraform!
- Protip: To keep AWS charges to a minimum, run terraform destroy at the end of the tutorial, if you wish.
- I am using main.tf, variables.tf, and outputs.tf consistently throughout this project. You may wish to change the names, or just develop in one single file. All tf files in a directory will be compiled together. Separating them is my personal preference to keep things modular and minimize the amount of code I have to read when I want to go back and make a change later.
- I am using MAC OS Majave, so change the bash commands appropriately if you are using any other OS.
What are we building?
In this tutorial, first, we are going to build a Virtual Private Cloud. We do not want the RDS instance to be publicly available. Hence, next, we will add a private subnet that will contain the TeamCity Database. Then, we’re going to add a NAT gateway, and a public subnet. We will add routing and security groups for the public and the private subnets. In this example, I am using RDS instance for the postgresql database and would like to have S3 bucket for the backups. Finally, we’re going to launch an EC2 instance inside the public subnet. We’ll use TeamCity’s docker image to host TeamCity inside the EC2 instance.
- Create a VPC
- Build a private subnet for TeamCity’s database on RDS
- Create a public subnet for NAT
- Add NAT
- Create a public subnet
- Create routing
- Create a security group for the public Subnet
- Create a security group for the private Subnet
- Add RDS
- Create the database
- Create S3 backup
- Launch a public EC2 instance to host the TeamCity (using docker image) and connect to RDS PostgreSQL
Let’s get started!!
Create a VPC
If you have created your Amazon account within the past couple of years, it’s likely that it comes with a default VPC. We are going to create an isolated Virtual Private Cloud and subnets and use them to host TeamCity.
Once you’ve installed terraform, create an empty folder where you want to write your code, and cd into it:
$ mkdir teamcity
$ cd teamcity
In the root directory, create a file called main.tf. tf is a terraform convention. We will use this main.tf as a driver that contains other modules to build the pieces we need.
$ touch main.tfNow let’s write some terraform code. An advantage of infrastructure as code is that it’s scalable and makes it easy to change your infrastructure provider. In this tutorial we’re going to use AWS, thus, our provider is aws.
I am going to use us-east-2. You can use any region you like. To prevent automatic upgrades to new major versions that may contain breaking changes, add version = “…” constraints to the corresponding provider blocks in configuration with the constraint strings suggested below. You can find the possible provider version constraints in the Terraform documentation.
_main.tf
provider "aws" {
  region = "us-east-2"
  version = "~> 1.54"
}
Next, we want to add an aws_vpc resource to create our VPC. We’ll call it vpc. This is like naming a variable so you can access it later throughout your project.
For the cidr_block, we’re using the 10.0.0.0 as opposed to 192.168 because it’s more common: 192.168 is mainly associated with your personal IP.
enable_dns_hostnames by default is false. We want to enable DNS hostnames in the VPC, so set it to true.
Add a tag for “Name” to see the name in the VPC list, esspecially if you have more than 1 VPC, so that you can easily distinguish them.
main.tf
resource "aws_vpc" "vpc" {
  cidr_block            = "10.0.0.0/16"
  enable_dns_hostnames  = true

  tags {
    Name = "Teamcity VPC"
  }
}
Now you have enough code to see terraform in action. In your terminal, initialize terraform:
$ terraform initIf you look at your project’s root directory, you see a .terraform folder. This is to keep the current status of your terraform commands and keep track of what’s been created or changed.
To see the plan before you execute it, run the following command:
$ terraform planYou will see the following error because you haven’t told terraform how to access your Amazon account!
Error: Error refreshing state: 1 error(s) occurred:

* provider.aws: No valid credential sources found for AWS Provider.
  Please see https://terraform.io/docs/providers/aws/index.html for more information on
  providing credentials for the AWS Provider
You can do this in a couple of different ways. I’m going to assume that you’re familiar with AWS’s Best Practices for Managing AWS Access Keys. As a brief primer, there are only a few AWS tasks that require root. You should, at a minimum, have created an IAM Admin User and Group. Use your IAM user’s access keys, not keys attached to your root user. Setting this up is outside the scope of this tutorial, but refer to the AWS documentation if you need to do this step.
You can export the credentials as environment variables into the terminal shell and you won’t be prompted as long as you use that shell. Or you can save them into a .tfvars file and add it to the provider (make sure to include this file in .gitignore).
Export into the shell (if you choose this skip creating variables.tf and modifications to main.tf. You can run terraform plan and you won’t see any errors)
$ export AWS_SECRET_ACCESS_KEY="YOUR_SECRET_KEY"
$ export AWS_ACCESS_KEY_ID="YOUR_ACCESS_KEY"
If you want to use a .tfvars file instead, add the terraform file to your root directory:
$ touch terraform.tfvarsterraform.tfvars
aws_access_key = "YOUR_ACCESS_KEY"
aws_secret_key = "YOUR_SECRET_KEY"
If you exported the values in the shell, skip the following and variables.tf and run terraform plan
main.tf
provider "aws" {
  .
  .

  access_key = "${var.aws_access_key}"
  secret_key = "${var.aws_secret_key}"
}
Run
$ terraform planNow you see a different error: :/
Error: provider config 'aws': unknown variable referenced: 'aws_access_key'; define it with a 'variable' block
Error: provider config 'aws': unknown variable referenced: 'aws_secret_key'; define it with a 'variable' block
In the root directory create a variables.tf file. For the rest of this tutorial, we’ll use this file to declare what variables we need for the modules we are going to build.
$ touch variables.tfTerraform variables are declared in a variable block. You can declare a type, description, and a default value:
variables.tf
variable "aws_access_key" {
  description = "AWS access key"
}

variable "aws_secret_key" {
  description = "AWS secret key"
}
Try again to see the plan that’s going to be executed and verify that’s what your want to do. In our case, we want to create a vpc:
$ terraform plan

data.aws_availability_zones.zones: Refreshing state...

------------------------------------------------------------------------

An execution plan has been generated and is shown below.
Resource actions are indicated with the following symbols:
  + create

Terraform will perform the following actions:

  + module.vpc.aws_vpc.vpc
      id:                               <computed>
      arn:                              <computed>
      assign_generated_ipv6_cidr_block: "false"
      cidr_block:                       "10.0.0.0/16"
      default_network_acl_id:           <computed>
      default_route_table_id:           <computed>
      default_security_group_id:        <computed>
      dhcp_options_id:                  <computed>
      enable_classiclink:               <computed>
      enable_classiclink_dns_support:   <computed>
      enable_dns_hostnames:             "true"
      enable_dns_support:               "true"
      instance_tenancy:                 "default"
      ipv6_association_id:              <computed>
      ipv6_cidr_block:                  <computed>
      main_route_table_id:              <computed>
      owner_id:                         <computed>
      tags.%:                           "1"
      tags.Name:                        "Teamcity VPC"


Plan: 1 to add, 0 to change, 0 to destroy.

------------------------------------------------------------------------
Looks great, run the following command to execute the plan. You will be prompted to verify if that’s what you want to do…enter yes:
$ terraform applyGreat!!!! Now if you navigate to VPC on your AWS account (AWS > Services > VPC). You see that the VPC is created! This is step 1 in your architecture diagram.
Building a private subnet for RDS
In this section we’re going to add more code to our terraform project. Before we do so, let’s do a small refactoring to keep things organized going forward. Some of you may think this isn’t needed yet unless I call the same block of code 3 times…you can go ahead and use a single file. Personally, I like to add a little structure to my projects, knowing this is going to grow:
In terraform, modules, are similar to classes in OO programing. I want to move the job of creating VPC, subnets, NAT, and routing to separate modules.
$ mkdir vpc
$ touch vpc/main.tf
Now let’s move the “aws_vpc” from main.tf to vpc/main.tf
vpc/main.tf
resource "aws_vpc" "vpc" {
  cidr_block           = "10.0.0.0/16"
  enable_dns_hostnames = true

  tags {
    Name = "Teamcity VPC"
  }
}
Now change the main.tf to call module vpc. The source’s value is the path to the vpc module. You can also include a git url, if a different team is in charge of that module.
main.tf
.
.

module "vpc" {
  source = "vpc"
}
Because we just added a folder (module vpc), we need to run terraform init to let terraform know about this change:
$ terraform initMoving forward…
RDS needs multiple zones and at least 2 private subnets. Before we add a private subnet, however, we need to create a NAT. A NAT needs an Elastic IP to work, and needs to be in the public subnet.
Let’s go ahead and make those changes. We will be using aws_eip, aws_nat_gateway
$ touch vpc/nat.tfvpc/nat.tf
resource "aws_eip" "nat_gw_eip" {
  vpc = true

  tags {
    Name = "TeamCity NAT"
  }
}

resource "aws_nat_gateway" "gw" {
  allocation_id = "${aws_eip.nat_gw_eip.id}"
  subnet_id     = "${aws_subnet.public.id}"

  tags {
    Name = "TeamCity NAT Gateway"
  }
}
Now we’re ready to add a single public subnet.
$ touch vpc/subnets.tfNavigate to vpc/subnets.tf inside the vpc folder. We want to add an aws_subnet resource and name it public. I am passing a variable availability_zone since I don’t have a preference. If you do, you can hard-code this to be “us-east-2a” for example.
.
.

resource "aws_subnet" "public" {
  availability_zone = "${element(var.availability_zones, count.index)}"
  cidr_block        = "${var.public_cidr_block}"
  vpc_id            = "${aws_vpc.vpc.id}"

  tags {
    Name = "Public TeamCity Subnet"
  }
}
Now we’re ready to create a route table and association for the NAT.
$ touch vpc/routing.tfIn this file, we need to create an aws_internet_gateway (we name it vpc_igw). Then create an aws_route_table (vpc_public). Last but not the least, an association resource, aws_route_table_association (vpc_public).
vpc/routing.tf
resource "aws_internet_gateway" "vpc_igw" {
  vpc_id = "${aws_vpc.vpc.id}"

  tags {
    Name = "TeamCity Gateway"
  }
}

resource "aws_route_table" "vpc_public" {
  vpc_id = "${aws_vpc.vpc.id}"

  route {
    cidr_block = "0.0.0.0/0"
    gateway_id = "${aws_internet_gateway.vpc_igw.id}"
  }

  tags {
    Name = "TeamCity Public Subnet Route Table"
  }
}

resource "aws_route_table_association" "vpc_public" {
  subnet_id      = "${aws_subnet.public.id}"
  route_table_id = "${aws_route_table.vpc_public.id}"
}
Everything looks good. Since we are already calling the vpc module from main.tf, let’s go ahead and see the plan so far:
$ terraform plan

Error: resource 'aws_subnet.public' config: unknown variable referenced: 'availability_zones'; define it with a 'variable' block
Error: resource 'aws_subnet.public' config: unknown variable referenced: 'public_cidr_block'; define it with a 'variable' block
Looks like we need to pass in some variables:
$ touch vpc/variables.tfLet’s create a default cidr_block inside the vpc/variables.tf but pass in the availability_zones from main.tf.
vpc/variables.tf
variable "availability_zones" {
  description = "List of availability zones over which to distribute subnets"
  type        = "list"
}

variable "public_cidr_block" {
  default = "10.0.0.0/24"
}
and change the main.tf, where we call the vpc module:
.
.

data "aws_availability_zones" "zones" {}

module "vpc" {
  .
  availability_zones = ["${data.aws_availability_zones.zones.names}"]
}
Before we apply our changes, let’s create a security group for this public VPC as well:
$ mkdir sg && touch sg/main.tfInside sg/main.tf, we are going to create an aws_security_group (teamcity_web_sg) and add ingress and egress rules:
sp/main.tf
resource "aws_security_group" "teamcity_web_sg" {
  name        = "TeamCity_sg"
  description = "Allow TeamCity SSH & HTTP inbound connection"
  vpc_id      = "${var.vpc_id}"

  ingress {
    from_port   = 22
    to_port     = 22
    protocol    = "tcp"
    cidr_blocks = ["0.0.0.0/0"]
  }

  ingress {
    from_port   = 8111
    to_port     = 8111
    protocol    = "tcp"
    cidr_blocks = ["0.0.0.0/0"]
  }

  egress {
    from_port   = "0"
    to_port     = "0"
    protocol    = "-1"
    cidr_blocks = ["0.0.0.0/0"]
  }

  tags {
    Name = "TeamCity Web Security Group"
  }
}
We are using the vpc_id to create the routing, let’s go ahead and pass that:
$ touch sg/variables.tfsg/variables.tf
variable "vpc_id" {
  type        = "string"
  description = "VPC ID in which to deploy RDS"
}
Last, but not least, we need to call this module from main.tf
.
.

module "sg" {
  source = "sg"
  vpc_id = "${module.vpc.vpc_id}"
}
Looks like we have solid code to build our public subnet. Since we added sg module, we need to init again:
$ terraform initAnd there’s error:
Initializing modules...
- module.vpc
- module.sg
  Getting source "sg"

Error: module 'sg': "vpc_id" is not a valid output for module "vpc"
This is because we’re passing vpc_id, but we never defined it anywhere:
$ touch vpc/outputs.tfvpc/outputs.tf
output "vpc_id" {
  value = "${aws_vpc.vpc.id}"
}
Let’s try again:
$ terraform init
$ terraform plan
# Notice all the new resources that are in green
# Plan: 7 to add, 0 to change, 0 to destroy.

$ terraform apply
If you want to see all the changes you made, navigate to:
- AWS > VPCs
- Subnets
- Route Tables
- Internet Gateways
- Elastic IPs
- Nat Gateways
- Network ACLs
- Security Groups
That’s a lot of changes! This is a good place to commit our changes to git, if you haven’t done it yet. This is my .gitignore file:
# Local .terraform directories
**/.terraform/*

# .tfstate files
*.tfstate
*.tfstate.*

# secret files
*.tfvars

# Crash log files
crash.log

# Ignore override files as they are usually used to override resources locally and so
# are not checked in
override.tf
override.tf.json
*_override.tf
*_override.tf.json
Now, we’re ready to create our private subnet and security group for the RDS:
vpc/subnets.tf
.
.

resource "aws_subnet" "private" {
  availability_zone = "${element(var.availability_zones, count.index)}"
  cidr_block        = "${element(var.private_cidr_block, count.index)}"
  count             = "${length(var.private_cidr_block)}"
  vpc_id            = "${aws_vpc.vpc.id}"

  tags {
    Name = "${format("TeamCity Private Subnet %d", count.index + 1)}"
  }
}

resource "aws_db_subnet_group" "rds" {
  name        = "teamcity-subnet-group"
  description = "TeamCity RDS Subnet Group"
  subnet_ids  = ["${aws_subnet.private.*.id}"]

  tags {
    Name = "TeamCity RDS Subnet Group"
  }
}
vpc/routing.tf
.
.

resource "aws_route_table" "vpc_private" {
  vpc_id = "${aws_vpc.vpc.id}"

  route {
    cidr_block = "0.0.0.0/0"
    gateway_id = "${aws_nat_gateway.gw.id}"
  }

  tags {
    Name = "TeamCity Private Subnet's Route Table"
  }
}

resource "aws_route_table_association" "vpc_private" {
  count          = "${var.length}"
  subnet_id      = "${element(aws_subnet.private.*.id, count.index)}"
  route_table_id = "${aws_route_table.vpc_private.id}"
}
vpc/variables.tf
.
.

variable "length" {
  default = 1
}

variable "private_cidr_block" {
  type    = "list"
  default = ["10.0.1.0/24", "10.0.2.0/24"]
}
and the RDS security group:
resource "aws_security_group" "rds_sg" {
  name        = "TeamCity_rds_sg"
  description = "TeamCity RDS Security Group"
  vpc_id      = "${var.vpc_id}"

  # TODO: Should this change to only allow ssh from other IPs?
  ingress {
    from_port   = 22
    to_port     = 22
    protocol    = "tcp"
    cidr_blocks = ["0.0.0.0/0"]
  }

  ingress {
    from_port   = 5432
    to_port     = 5432
    protocol    = "tcp"
    cidr_blocks = ["0.0.0.0/0"]
  }

  egress {
    from_port   = "0"
    to_port     = "0"
    protocol    = "-1"
    cidr_blocks = ["0.0.0.0/0"]
  }

  tags {
    Name = "TeamCity RDS Security Group"
  }
}
Apply the changes:
$ terraform applyCongrats! You have everything you need to build your RDS now! Don’t forget to commit your changes often!
So far, this is what my folder structure looks like:
.
├── main.tf
├── sg
│   ├── main.tf
│   └── variables.tf
├── terraform.tfstate
├── terraform.tfstate.backup
├── terraform.tfvars
├── variables.tf
└── vpc
    ├── main.tf
    ├── nat.tf
    ├── outputs.tf
    ├── routing.tf
    ├── subnets.tf
    └── variables.tf
Add RDS
Let’s add our RDS module first:
$ mkdir rds && touch rds/main.tf && touch rds/variables.tfWe will be using an aws_db_instance resource. I am using an instance_class that’s available in us-east-2. Change the instance_class appropriately if you are using a different region (please refer to the Notes section in the beginning of this tutorial).
rds/main.tf
resource "aws_db_instance" "database" {
  identifier                = "${var.instance_identifier}"
  final_snapshot_identifier = "${var.instance_identifier}"
  skip_final_snapshot       = true
  allocated_storage         = "60"
  storage_type              = "gp2"
  engine                    = "postgres"
  instance_class            = "db.t2.medium"
  name                      = "${var.db_name}"
  username                  = "${var.db_username}"
  password                  = "${var.db_password}"
  port                      = 5432
  publicly_accessible       = false
  vpc_security_group_ids    = ["${var.vpc_security_group_ids}"]
  db_subnet_group_name      = "${var.db_subnet_group_name}"
  multi_az                  = true
  backup_retention_period   = 7
  backup_window             = "08:17-08:47"
  maintenance_window        = "sat:09:30-sat:22:00"

  tags {
    Name = "TeamCity RDS"
  }
}
rds/variables.tf
variable "db_password" {
  default = "default value"
}

variable "db_subnet_group_name" {
  default = "default value"
}

variable "db_name" {
  default = "default value"
}

variable "db_username" {
  default = "default value"
}

variable "dns_name" {
  default = "default value"
}

variable "instance_identifier" {
  default = "default value"
}

variable "private_subnet_id" {
  default = "default value"
}

variable "service_name" {
  default = "default value"
}

variable "vpc_id" {
  default = "default value"
}

variable "vpc_security_group_ids" {
  default = "default value"
}
Call the rds module from main.tf
.
.

module "rds" {
  source                 = "rds"
  db_name                = "${var.db_name}"
  db_password            = "${var.db_password}"
  db_username            = "${var.db_username}"
  db_subnet_group_name   = "${module.vpc.db_subnet_group_name}"
  dns_name               = "pg"
  instance_identifier    = "${var.db_name}"
  vpc_id                 = "${module.vpc.vpc_id}"
  private_subnet_id      = ["${module.vpc.private_subnet}"]
  service_name           = "TeamCity"
  vpc_security_group_ids = "${module.sg.rds_security_groups_id}"
}
If you run the init, you will see that we’re missing a few variables. Let’s go ahead and get rid of those errors. First is db_password. We are going to add the password to the terraform.tfvars. This file is not getting checked and it’s a safe place to store our secrets.
terraform.tfvars
db_password = "YOUR_DB_PASSWORD"variables.tf
.
.

variable "db_name" {
  default = "teamcity"
}

variable "db_password" {
  type = "string"
}

variable "db_username" {
  default = "teamcityuser"
}
We also need to add a few outputs:
$ touch sg/outputs.tfsg/outputs.tf
output "rds_security_groups_id" {
  value = "${aws_security_group.rds_sg.id}"
}
vpc/outputs/tf
output "private_subnet" {
  value = ["${aws_subnet.private.*.id}"]
}

output "db_subnet_group_name" {
  value = "${aws_db_subnet_group.rds.name}"
}
Now we’re ready:
$ terraform refresh
$ terraform apply
This is going to take a while… so go out for a coffee break and stretch. See you in about 15-20 min! . . .
Nice! Navigate to AWS > RDS to see your newly created RDS!
While we’re at it, let’s create an S3 bucket for the backup
This is going to be very short and sweet compared to the last step:
$ mkdir s3 && touch s3/main.tf && touch s3/variables.tf && touch s3/outputs.tfs3/main.tf
resource "aws_s3_bucket" "backup_bucket" {
  bucket = "${var.name}"
  acl    = "private"

  tags {
    Name = "${var.description}"
  }
}
s3/variables.tf
variable "name" {
  description = "Name of the S3 Bucket"
}

variable "description" {
  description = "Description of the S3 Bucket (for tagging)"
}
s3/outputs.tf
output "arn" {
  value = "${aws_s3_bucket.backup_bucket.arn}"
}
main.tf
.
.

#S3 bucket name has to be unique
module "backup_bucket" {
  source      = "s3"
  name        = "${var.unique_s3_name}"
  description = "TeamCity Backups"
}
variables.tf
.
.

variable "unique_s3_name" {
  default = "PICK_A_GLOBALLY_UNIQUE_NAME"
}
Apply changes:
$ terraform init
$ terraform apply
Looks good!
Summary: So far we have created a VPC, a public subnet, NAT, 2 private subnets, public, private and rds security groups, an RDS instance in the private subnet, and an S3 bucket for the backup. At this point, my folder structure looks like this:
.
├── main.tf
├── rds
│   ├── main.tf
│   └── variables.tf
├── s3
│   ├── main.tf
│   ├── outputs.tf
│   └── variables.tf
├── sg
│   ├── main.tf
│   ├── outputs.tf
│   └── variables.tf
├── terraform.tfstate
├── terraform.tfstate.backup
├── terraform.tfvars
├── variables.tf
└── vpc
    ├── main.tf
    ├── nat.tf
    ├── outputs.tf
    ├── routing.tf
    ├── subnets.tf
    └── variables.tf

4 directories, 19 files
Launch a public EC2 instance to host TeamCity
Now we’re ready to build our EC2 instance. We are going to launch this in the public subnet. Next we’re going to use TeamCity Docker image and run it in our instance and configure it to use the RDS we just built.
I am going to use a debian trusted image that I have used before. You may choose a debian, ubuntu, etc. Just keep in mind that they might have a different default username to use for ssh. For example, debian uses admin.
$ mkdir ec2 && touch ec2/main.tf && touch ec2/variables.tfBefore we create the ec2 module, AWS requires a Key Pair. For simplicity, we can generate a key-pair and upload it to teamcity. I am using a makefile to generate the key and save it in ~/.ssh, you can change the path if you wish. Let’s call our key teamcity. Create makefile in the root.
makefile
SHELL := /usr/bin/env bash
ssh-key:
  test ! -f ~/.ssh/teamcity.pub && ssh-keygen -t rsa -C 'teamcity' -P '' -f ~/.ssh/teamcity && chmod 400 ~/.ssh/teamcity.pub
Make is very particular about spacing, so make sure you get the tabs right!
Then, we need to upload the public key to aws.
ec2/main.tf
resource "aws_key_pair" "upload_key" {
  key_name              = "${var.key_name}"
  public_key            = "${file("${var.ssh_path}/${var.key_name}.pub")}"
}
Now let’s add the ec2 instance. Again, git I am using an instance_type that’s available and affordable on us-east-2, change this appropriately if you are using a different region (please refer to the Notes section in the beginning of this tutorial).
ec2/main.tf
.
.

resource "aws_instance" "teamcity" {
  ami                         = "${var.ami}"
  instance_type               = "t3.medium"
  key_name                    = "${var.key_name}"
  subnet_id                   = "${var.public_subnet_id}"
  user_data                   = "${data.template_file.teamcity_userdata.rendered}"
  vpc_security_group_ids      = ["${var.vpc_security_group_ids}"]
  associate_public_ip_address = true

  tags = {
    Name = "TeamCity"
  }

  lifecycle {
    create_before_destroy = true
  }
}
I want to use the user_data to configure the instance immediately using a template, using resource. Do add this to ec2/main.tf
.
.

data "template_file" "teamcity_userdata" {
  template = "${file("${path.module}/scripts/setup.sh")}"

  vars {
    db_url      = "${var.db_url}"
    db_port     = "${var.db_port}"
    db_name     = "${var.db_name}"
    db_username = "${var.db_username}"
    db_password = "${var.db_password}"
  }
}
db_setup.sh will contain all the steps that I want to run in order to configure my instance. You can also ssh into the machine and run these manually. I am also installing “tree” and “touch” because I use them often: You can customize it however you want.
$ mkdir ec2/scripts && touch ec2/scripts/setup.shec2/scripts/setup.sh
#!/bin/bash
sudo apt-get update
sudo apt-get install tree
sudo apt-get install touch
sudo mkdir -p /opt/teamcity
sudo mkdir -p /opt/teamcity/var/logs
sudo mkdir -p /opt/teamcity/lib/jdbc
sudo mkdir -p /opt/teamcity/config
sudo apt-get install -y apt-transport-https dirmngr
echo 'deb https://apt.dockerproject.org/repo debian-stretch main' | sudo tee --append /etc/apt/sources.list
sudo apt-key adv --keyserver hkp://p80.pool.sks-keyservers.net:80 --recv-keys F76221572C52609D
sudo apt-get update
sudo apt-get install -y docker-engine --allow-unauthenticated
sudo docker system prune -af
sudo docker rm $(docker ps -aq)
sudo docker pull jetbrains/teamcity-server
DEBIAN_FRONTEND=noninteractive sudo apt-get update -y
DEBIAN_FRONTEND=noninteractive sudo apt-get install -y wget
wget https://jdbc.postgresql.org/download/postgresql-9.4.1209.jre6.jar
sudo mv postgresql-9.4.1209.jre6.jar /opt/teamcity/lib/jdbc/
sudo tee /opt/teamcity/config/database.properties <<EOF
connectionUrl=jdbc:postgresql://${db_url}:${db_port}/${db_name}
connectionProperties.user=${db_username}
connectionProperties.password=${db_password}
EOF
sudo sudo apt-get install -y postgresql
sudo docker run --rm -d --name teamcity-server-instance -v /opt/teamcity:/data/teamcity_server/datadir -v /opt/teamcity/var/logs:/opt/teamcity/logs -p 8111:8111 jetbrains/teamcity-server
Let’s go ahead and create our variables.
ec2/variables.tf
variable "ami" {
  description = "trusted debian ami"
  default     = "default value"
}

variable "db_url" {
  default = "default value"
}

variable "db_username" {
  default = "default value"
}

variable "db_password" {
  default = "default value"
}

variable "db_port" {
  default = "default value"
}

variable "db_name" {
  default = "default value"
}

variable "key_name" {
  default = "default value"
}

variable "public_subnet_id" {
  default = "default value"
}

variable "ssh_path" {
  default = "default value"
}

variable "vpc_security_group_ids" {
  default = "default value"
}
It’s time to call our ec2 module.
main.tf
.
.

module "ec2" {
  source                 = "ec2"
  ami                    = "${var.debian_ami}"
  db_username            = "${var.db_username}"
  db_password            = "${var.db_password}"
  db_name                = "${var.db_name}"
  db_port                = "${module.rds.db_port}"
  db_url                 = "${module.rds.database_address}"
  key_name               = "${var.key_name}"
  public_subnet_id       = "${module.vpc.public_subnet}"
  ssh_path               = "${var.ssh_path}"
  vpc_security_group_ids = "${module.sg.web_security_groups_id}"
}
I kept my debian_ami in the variables.tf because I am going to use that image in a couple of other places later…you can hard-code it if you want to. Also, I am using the debian_ami that’s available on us-east-2. Change the image if you are using a different region (please refer to the Notes section in the beginning of this tutorial).
Notice: key_name should be the name of the key you added in AWS. Also, I keep my keys is ~/.ssh…modify this variable accordingly.
variables.tf
.
.

variable "key_name" {
  default = "teamcity"
}

variable "debian_ami" {
  default = "ami-05829248ffee66250"
}

variable "ssh_path" {
  default = "~/.ssh"
}
Let’s add the rest of the variables and outputs we need.
$ touch rds/outputs.tfrds/outputs.tf
output "database_address" {
  value = "${replace(aws_db_instance.database.endpoint, ":5432", "")}"
}

output "db_port" {
  value = "5432"
}
vpc/outputs.tf
.
.

output "public_subnet" {
  value = "${aws_subnet.public.id}"
}
sg/outouts.tf
output "web_security_groups_id" {
  value = "${aws_security_group.teamcity_web_sg.id}"
}
Let’s output the ssh command so we can easily access our instance.
$ touch outputs.tfoutputs.tf
output "teamcity_web_ssh_command" {
  value = "${format("ssh -i ~/.ssh/teamcity admin@%s", "${module.ec2.teamcity_web_ip}")}"
}
Now we need to add an output for ec2 to give us the teamcity_web_ip:
$ touch ec2/outputs.tfec2/outputs.tf
output "teamcity_web_ip" {
  value = "${aws_instance.teamcity.public_dns}"
}
Let’s create our key. Rmember that you need to have make installed!
make ssh-keyAt this point, this is how my folder structure looks:
.
├── ec2
│   ├── main.tf
│   ├── outputs.tf
│   ├── scripts
│   │   └── setup.sh
│   └── variables.tf
├── main.tf
├── outputs.tf
├── rds
│   ├── main.tf
│   ├── outputs.tf
│   └── variables.tf
├── s3
│   ├── main.tf
│   ├── outputs.tf
│   └── variables.tf
├── sg
│   ├── main.tf
│   ├── outputs.tf
│   └── variables.tf
├── terraform.tfstate
├── terraform.tfstate.backup
├── terraform.tfvars
├── variables.tf
└── vpc
    ├── main.tf
    ├── nat.tf
    ├── outputs.tf
    ├── routing.tf
    ├── subnets.tf
    └── variables.tf

6 directories, 25 files
NOW … It’s the moment of truth!!!
$ terraform init
$ terraform plan
$ terraform apply
You should see a similar output to the following:
Apply complete! Resources: 1 added, 1 changed, 0 destroyed.

Outputs:

teamcity_web_ssh_command = ssh -i ~/.ssh/teamcity admin@ex.y.z.d.compute-1.amazonaws.com
BEAUTIFUL!
Navigate to AWS > EC2. You know have 1 running instance. Wait for the initialization to be done. When the status check is done and server is up you can access your TeamCity via browser: ex.y.z.d.compute-1.amazonaws.com:8111
The first time you access TeamCity via browser, TeamCity might take a long time to initialize, depending on the image and instance_type you chose for EC2.
Congratulations!
I hope this was helpful. Please let me know your thoughts. You can find the code on github: https://github.com/saslani/terraform_teamcity_aws This is a very simple setup, but is on the right track for something production-ready. If you would like to add features, please fork and send me a PR!